WP Pay Per View provides two default templates to override the product item templates in a WooCommerce product list. If you want to use your own template with a custom style, you need to install WP Coder first.
WP Coder provides a quick way to add raw HTML, CSS and JSON code which is necessary to create a template.
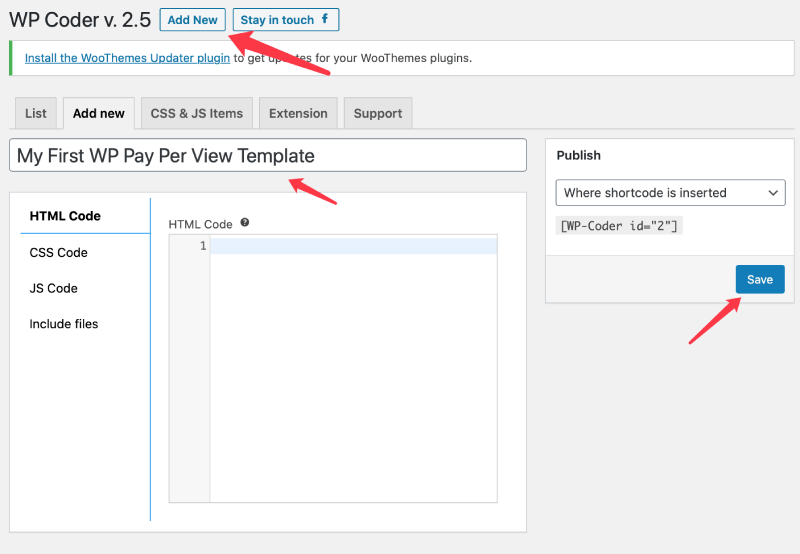
1. Add A New WP Coder item
After installing WP Coder, click Add New, enter a name for the template and then click Save.
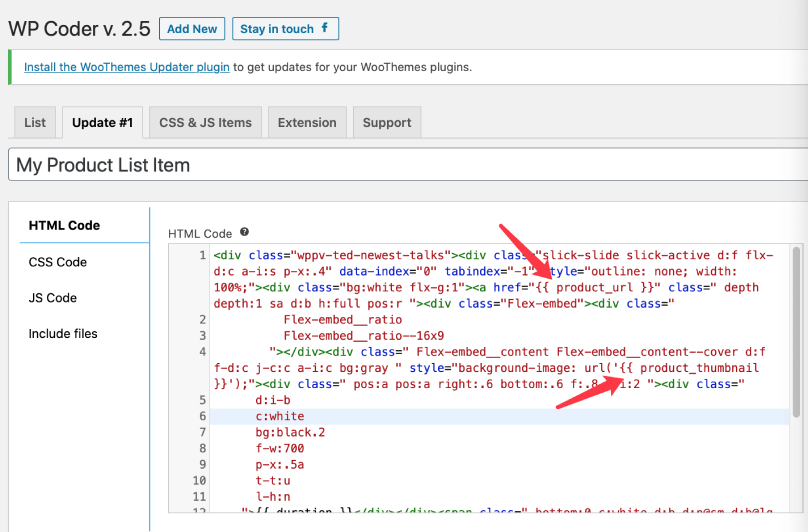
2. Add an HTML template
In the html section, you should add Twig template code which uses the {{ a_variable }} for dynamic loading of product information such as product title, product thumbnail.
The default variables are:
- Product title: {{ product_title }}
- Product ID: {{ product_id }}
- Product URL: {{ product_url }}
- Product price: {{ product_price }}
- Product rating: {{ product_rating }}
- Add to cart button: {{ add_to_cart }}
- Product sale slash: {{product_sale_slash}}
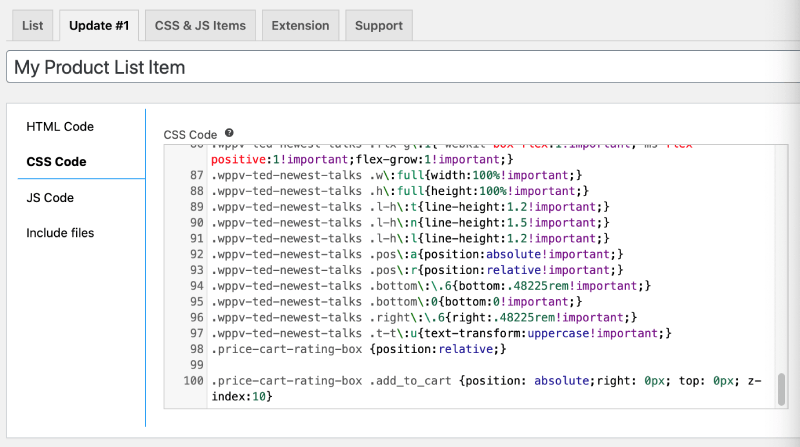
3. Add Custom CSS code
You can then add your custom CSS code in the CSS Code field.
4. Add JSON params in JS Code
WP Pay Per View templates use JSON to configure extra information about a video, such as created by, duration. The template preview image url can should be specified here too. Here is an example:
{
    "image": "https://www.fillmurray.com/640/360",
    "params": {
        "created_by": {
            "type": "text",
            "label": "Created By"
        },
        "duration": {
            "type": "text",
            "label": "Duration",
            "placeholder": "00:00"
        }
    }
}

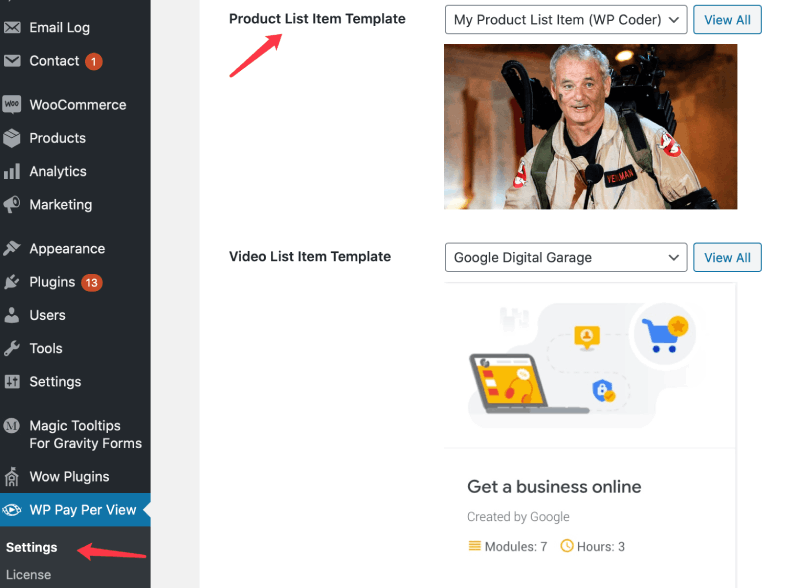
5. Apply a custom template in the Settings page
After you’ve created your custom template in WP Coder, you can now see a new item in WP Pay Per View > Settings > Product List Item Template and Video List Item Template, just select it and click Save Changes. And then you can see the result of the custom template you just created.
Recent Comments